
Wood Shake Roof Installation Service in Washington DC
Wood shake roofs combine natural beauty with outstanding durability, making them a sought-after choice for homeowners in the Washington DC area. At Washington DC Roofing Company, our expert team specializes in professional wood shake roof installation, bringing decades of experience to every project we undertake. We provide comprehensive wood shake roofing services using premium materials like white oak, redwood, and cedar that can withstand harsh weather conditions while adding distinctive character to your home.
The installation process for wood shake roofs requires specialized knowledge and precision that our certified technicians have mastered through years of practice. We begin each project with a complimentary inspection to assess your specific needs and provide a detailed estimate before any work begins. Our wood shake roofs are designed to offer excellent insulation properties while delivering the natural, rustic aesthetic that many homeowners desire.
We understand that investing in a wood shake roof represents a significant commitment to your property's value and appearance.
That's why we handle every installation with meticulous attention to detail, ensuring proper ventilation and underlayment to maximize your roof's lifespan. Our team serves the entire Washington DC metropolitan area, bringing the perfect combination of craftsmanship and customer service to each wood shake roof installation we complete.
Pre-Installation Considerations
Before beginning your wood shake roof installation, several important factors need to be addressed to ensure a successful, long-lasting result.
We stand firmly behind our work with a comprehensive 5-year workmanship warranty on all roof flashing repairs. This warranty complements any manufacturer warranties on materials used.
Our transparent pricing means no hidden fees or surprise charges. We provide detailed written estimates before beginning any work and maintain clear communication throughout the project.
Selecting the Right Materials
Wood shakes come in various types, with cedar being the most popular due to its natural resistance to decay and insects. We recommend selecting premium or #1 grade shakes for optimal durability and appearance. These higher grades offer better uniformity, fewer defects, and longer lifespan.
Thickness is another crucial consideration. Thicker shakes (typically 3/4" to 1-1/4") provide better insulation and weather resistance but cost more. Medium shakes (1/2" to 3/4") offer a good balance of
performance and value.
Consider pre-treated shakes with fire-retardant and preservative treatments for added protection and longevity, especially in humid or fire-prone regions.
Assessing Your Current Roof Structure
A thorough inspection of your existing roof structure is essential before installation begins. We evaluate the roof deck condition, looking for signs of water damage, rot, or structural issues that require repair.
Proper ventilation is critical for wood shake roofs. We inspect existing ventilation systems and may recommend upgrades to prevent moisture buildup that can damage shakes from underneath.
Structural load capacity must be verified, as wood shakes are heavier than many alternative materials. Your roof framing must be able to support this additional weight, especially if you're replacing a lighter roofing material.
Preparing for Installation
Timing your installation during dry, moderate weather conditions is ideal. We avoid installing wood shakes during rainy periods or extreme temperatures for optimal results.
Building permits and inspections are typically required for roof installations. We handle this paperwork to ensure compliance with local building codes and regulations specific to wood shake roofing.
Our Installation Process
Our team at Washington DC Roofing Company follows a meticulous process when installing wood shake roofs. We've refined our installation methods over years of experience to ensure durability, proper water drainage, and aesthetic appeal for every project we undertake.
Removing Old Roofing
Before installation begins, we completely remove the existing roofing material down to the deck. This critical step allows us to inspect the structure for any damage or rot that needs addressing before the new roof goes on.
We protect your landscaping and property with tarps during tear-off to catch debris. Our crews use specialized tools to remove old shingles, nails, and underlayment efficiently and completely.
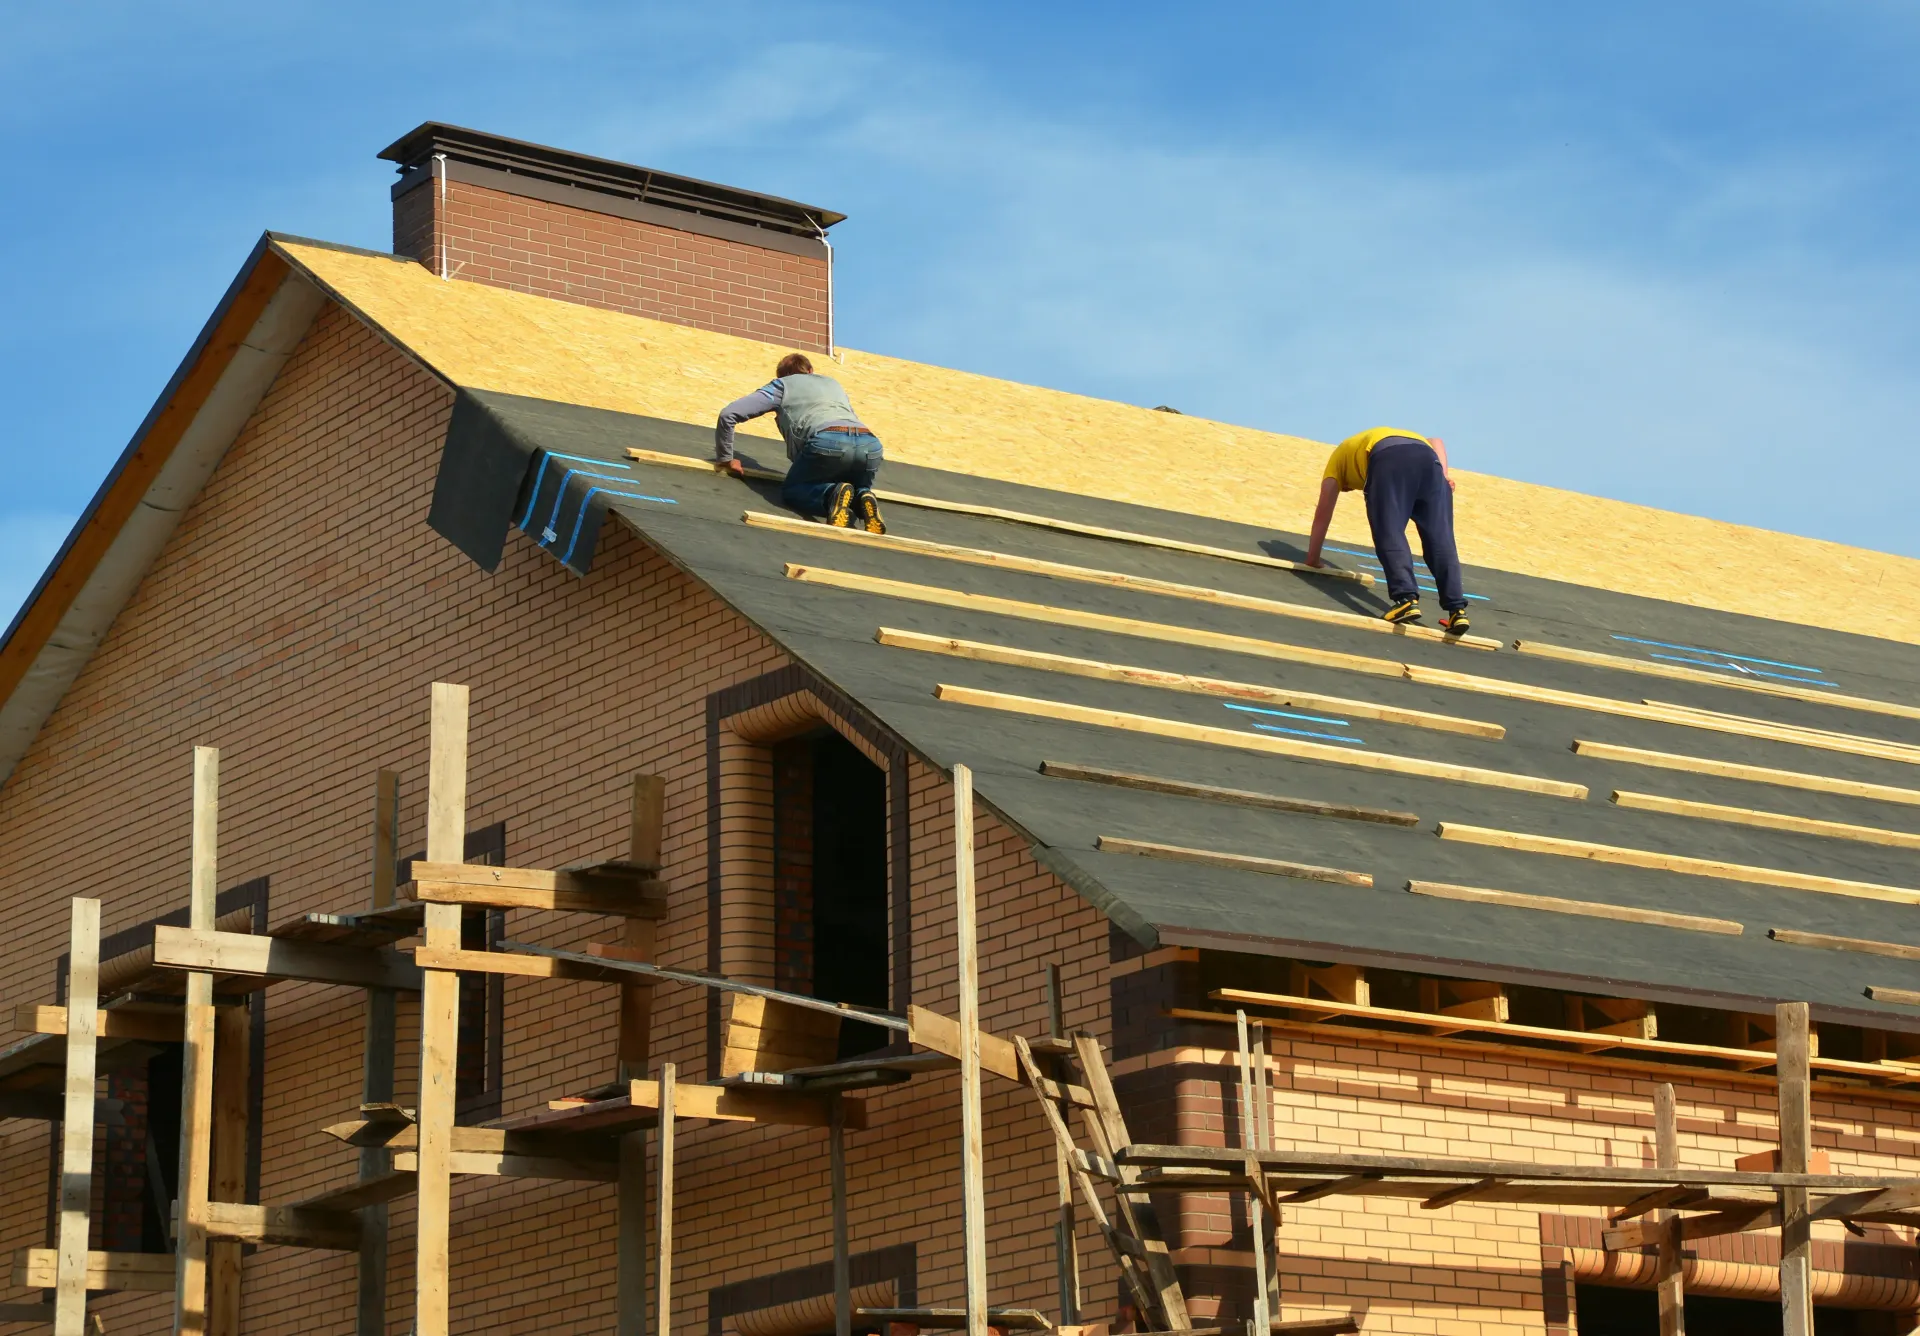
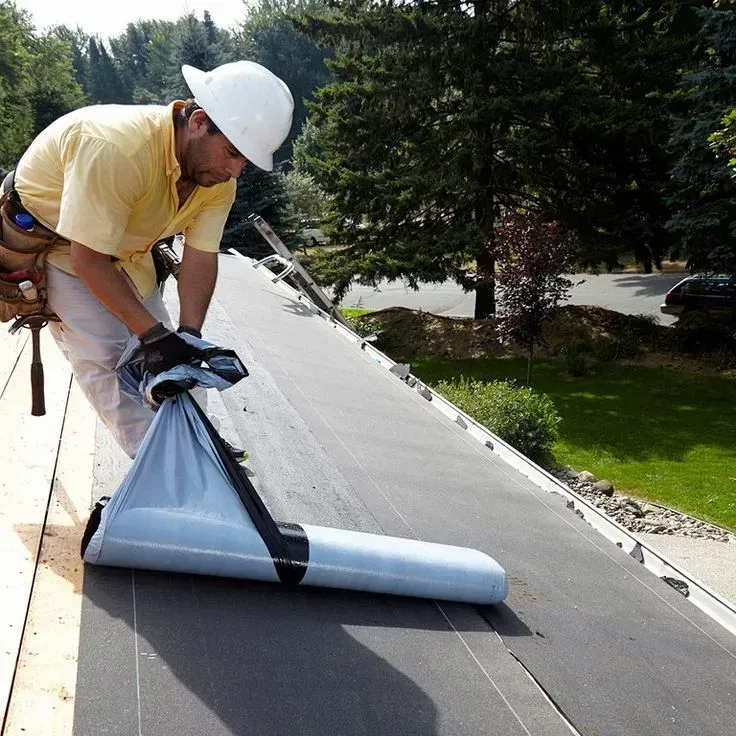
Installing Underlayment and Battens
After preparing the roof deck, we install a high-quality water-resistant underlayment. This crucial layer serves as a secondary defense against moisture infiltration beneath your wood shakes.
For wood shake roofs, we typically use 30-pound felt underlayment, applying it in overlapping rows starting from the bottom edge of the roof. In valleys and around roof penetrations, we install additional waterproofing materials for enhanced protection.
Next, we install wooden battens horizontally across the roof. These wooden strips create an airspace between the shakes and the underlayment, promoting ventilation and extending the life of your wood roof.
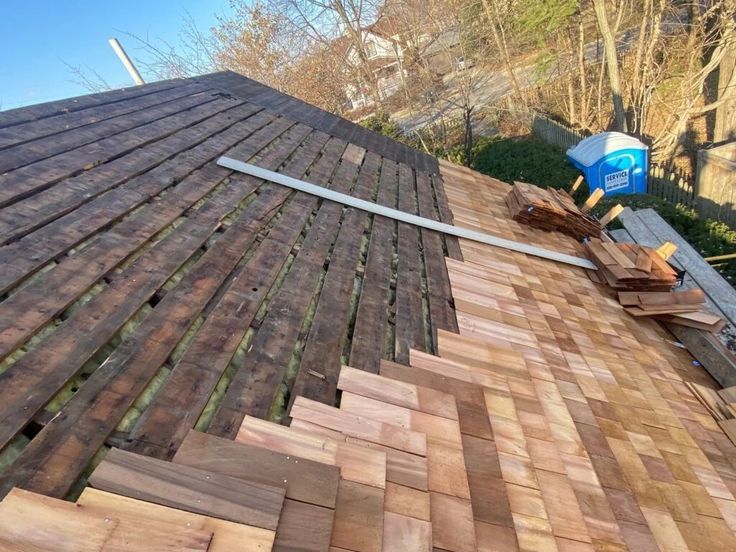
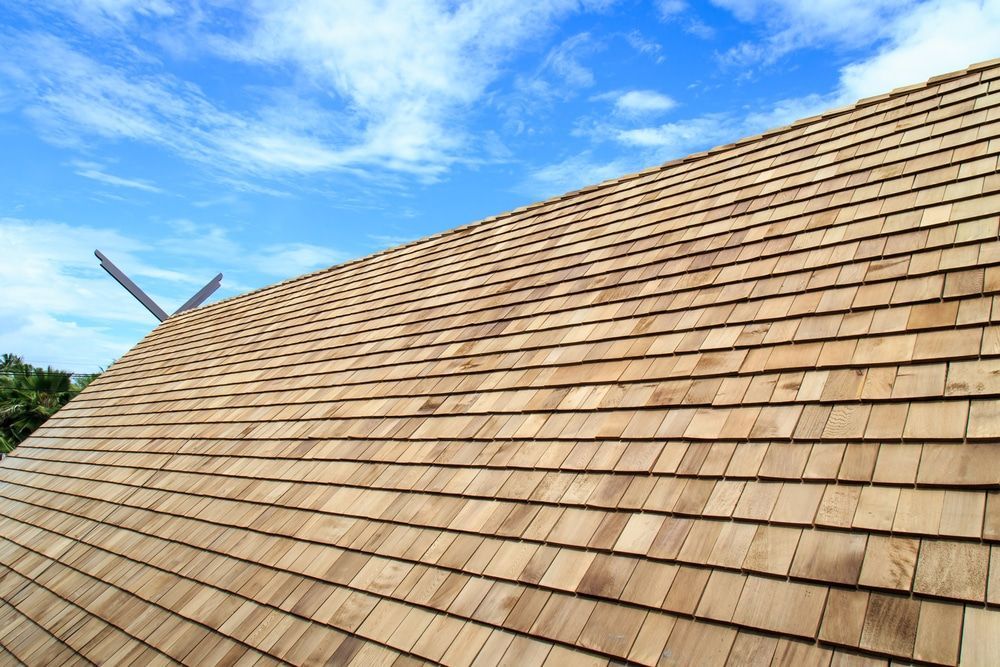
Laying Wood Shakes
Wood shakes are installed from the bottom edge of the roof upward in overlapping courses. We carefully select each shake, examining for defects or irregularities before placement.
The first course of shakes receives special treatment, often being doubled or installed at a different angle to ensure proper water drainage at the eaves. We maintain consistent exposure (the visible portion of each shake) throughout the roof.
Finishing Touches
As we reach the ridge of the roof, we install special ridge caps made from selected shake pieces. These caps protect the uppermost junction of the roof while creating a polished, finished appearance.
After installation, we conduct a thorough cleanup of the property, removing all debris and leftover materials. Our team then performs a final inspection to verify that every detail meets our exacting standards.
Maintaining Your Wood Shake Roof
A wood shake roof requires consistent care to maximize its lifespan and maintain its aesthetic appeal. Proper maintenance not only preserves your investment but also prevents costly repairs down the road.
Routine Maintenance and Inspections
We recommend inspecting your wood shake roof twice yearly—typically in spring and fall. Remove debris like leaves, branches, and pine needles that can trap moisture against the shakes. This
simple step prevents premature rotting and extends roof life.
Check for moss or algae growth, which thrives in shaded, moist areas. These organisms retain moisture and accelerate wood deterioration. Apply a moss treatment specifically formulated for cedar shakes when necessary.
Repairing Your Wood Shake Roof
Replace damaged shakes promptly to prevent water from penetrating to the roof deck. Individual shakes can be carefully removed and replaced without disturbing surrounding materials.
Split or cracked shakes should be addressed immediately. These damaged areas allow moisture to seep beneath the surface, potentially causing deck rot and interior leaks.
Long-Term Care Tips
Apply a quality preservative treatment every 5-7 years to maintain your wood shake roof's water resistance. This treatment also helps protect against UV damage and biological growth.
Trim overhanging branches that provide excessive shade or drop debris onto your roof. Good airflow and sunlight exposure help keep wood shakes dry and less hospitable to fungi.
Consider professional cleaning services every 3-5 years. Professionals use appropriate pressure and cleaning agents that won't damage the wood fibers.
FAQs
TPO roofing installations come with many common questions from our customers. We've gathered the most important information about costs, durability, brands, and maintenance to help you make informed decisions.
What are the factors influencing the cost of a TPO roof installation?
Several key elements affect TPO roofing costs. The size of your roof is the primary factor, as larger areas require more materials and labor.
The thickness of the TPO membrane impacts pricing significantly. We offer options ranging from 45 mil to 80 mil thickness, with thicker membranes costing more but providing enhanced durability.
Your roof's complexity matters too. Buildings with multiple penetrations, HVAC units, or unusual shapes require more detail work and flashing.
Accessibility affects labor costs. If your roof is difficult to reach or requires special equipment, this will increase the installation price.
How long does a TPO roof typically last under normal weather conditions?
TPO roofs installed by Washington DC Roofing Company typically last 20-30 years with proper maintenance. This lifespan depends on several factors including membrane thickness and local climate conditions.
The quality of installation significantly impacts longevity. Our certified installation team ensures all seams are properly welded and details are correctly finished.
Modern TPO formulations have improved UV and heat resistance compared to earlier generations. This enhancement helps maintain reflectivity and structural integrity over time.
Regular inspections can help identify and address small issues before they compromise the roof's lifespan.
Which TPO roofing brand shows the highest performance and reliability?
We primarily install GAF and Firestone TPO systems due to their consistent performance records and extensive warranties. These manufacturers have refined their formulations over decades.
GAF EverGuard TPO offers excellent heat and UV resistance with their advanced material science. Their products perform exceptionally well in Washington DC's varying climate conditions.
Firestone UltraPly TPO provides superior puncture resistance and flexibility, maintaining performance through seasonal temperature changes. Their seam strength is among the industry's best.
Both brands offer comprehensive warranty options that can extend up to 30 years when installed by certified contractors like us.
Are there any notable drawbacks when using TPO roofing for commercial buildings?
Installation quality is critical with TPO systems. Poorly welded seams can lead to leaks and premature failure, which is why we invest in ongoing training for our installation teams.
Some older TPO formulations had issues with premature aging and cracking. Today's improved materials have largely resolved these concerns, but choosing a quality manufacturer remains important.
TPO can be punctured by sharp objects, making regular roof inspections necessary. We recommend establishing maintenance protocols after installation.
While highly energy efficient, TPO's initial cost may be higher than some traditional roofing systems, though this is typically offset by energy savings over time.
Can a TPO roof be installed over an existing roofing system, and what are the considerations?
Yes, in many cases we can install TPO over existing roofing, potentially saving on removal costs and reducing landfill waste. This approach is called a "recover" installation.
The existing roof must be structurally sound and relatively dry. We conduct moisture scanning to detect any trapped water that could compromise the new system.
Building codes typically limit commercial buildings to two roof layers. We'll verify local regulations and assess your current roofing situation during consultation.
Proper preparation may include adding recovery board insulation to create a smooth, compatible surface for the new TPO membrane attachment.
Tell Us About Your Roofing Project
Contact Us
Our Newsletter
We will get back to you as soon as possible.
Please try again later.
Subscribe For Newsletter
All Rights Reserved | Washington DC Roofing Company